Number: SOP-TVL-12
Subject: Trip Authorization Importing Options
Summary: Determine the best option to use when importing a Trip Authorization report.
Source: University Travel Management Services
Date of Issue: 11/03/2023
Rationale
Emburse Enterprise has three options for importing your trip authorization into your expense report. These options determine what information is pulled into your expense report. Review the options below to determine when to import your trip authorization to best meet your needs.
Procedure
Before you start, open the SOP-TVL-12 companion guide to help you compare and select the best option.
Option 1
A prompt will appear as soon as you choose to create a new expense report:
What will be imported from the trip authorization:
- Report information from the header, including the trip dates and report type.
- Expense lines, including descriptions and amounts.
This is a good option if:
- Your actual trip dates match the dates on your trip authorization
- You’ve separated your miscellaneous expenses into separate Other Misc tiles, i.e., parking expenses are on one Other Misc expense line and estimated taxi expenses are on another Other Misc expense line.
Option 2
Option 2A
The next prompt to import a trip authorization will happen after the expense report header information has been entered manually and has been saved. Before adding any expense tiles manually, click to make the expense tile panel disappear.
Once you click “Add Trip Authorization Report,” and choose the appropriate report, you’ll see a checkbox that says "Import line items from Trip Authorization report":
The checkbox is checked by default.
What will be imported from the trip authorization:
- Expense lines, including descriptions and amounts.
This is a good choice if:
- Trip dates are different from trip dates on the trip authorization report.
- You’ve separated your miscellaneous expenses into separate Other Misc tiles, i.e., estimated parking expenses are on one Other Misc expense line and estimated taxi expenses are on another Other Misc expense line.
- You want to edit details of line items instead of entering them from scratch.
Option 2B
This prompt to import a trip authorization starts out the same as Option 2A. It will happen after the expense report header information has been entered manually and has been saved.
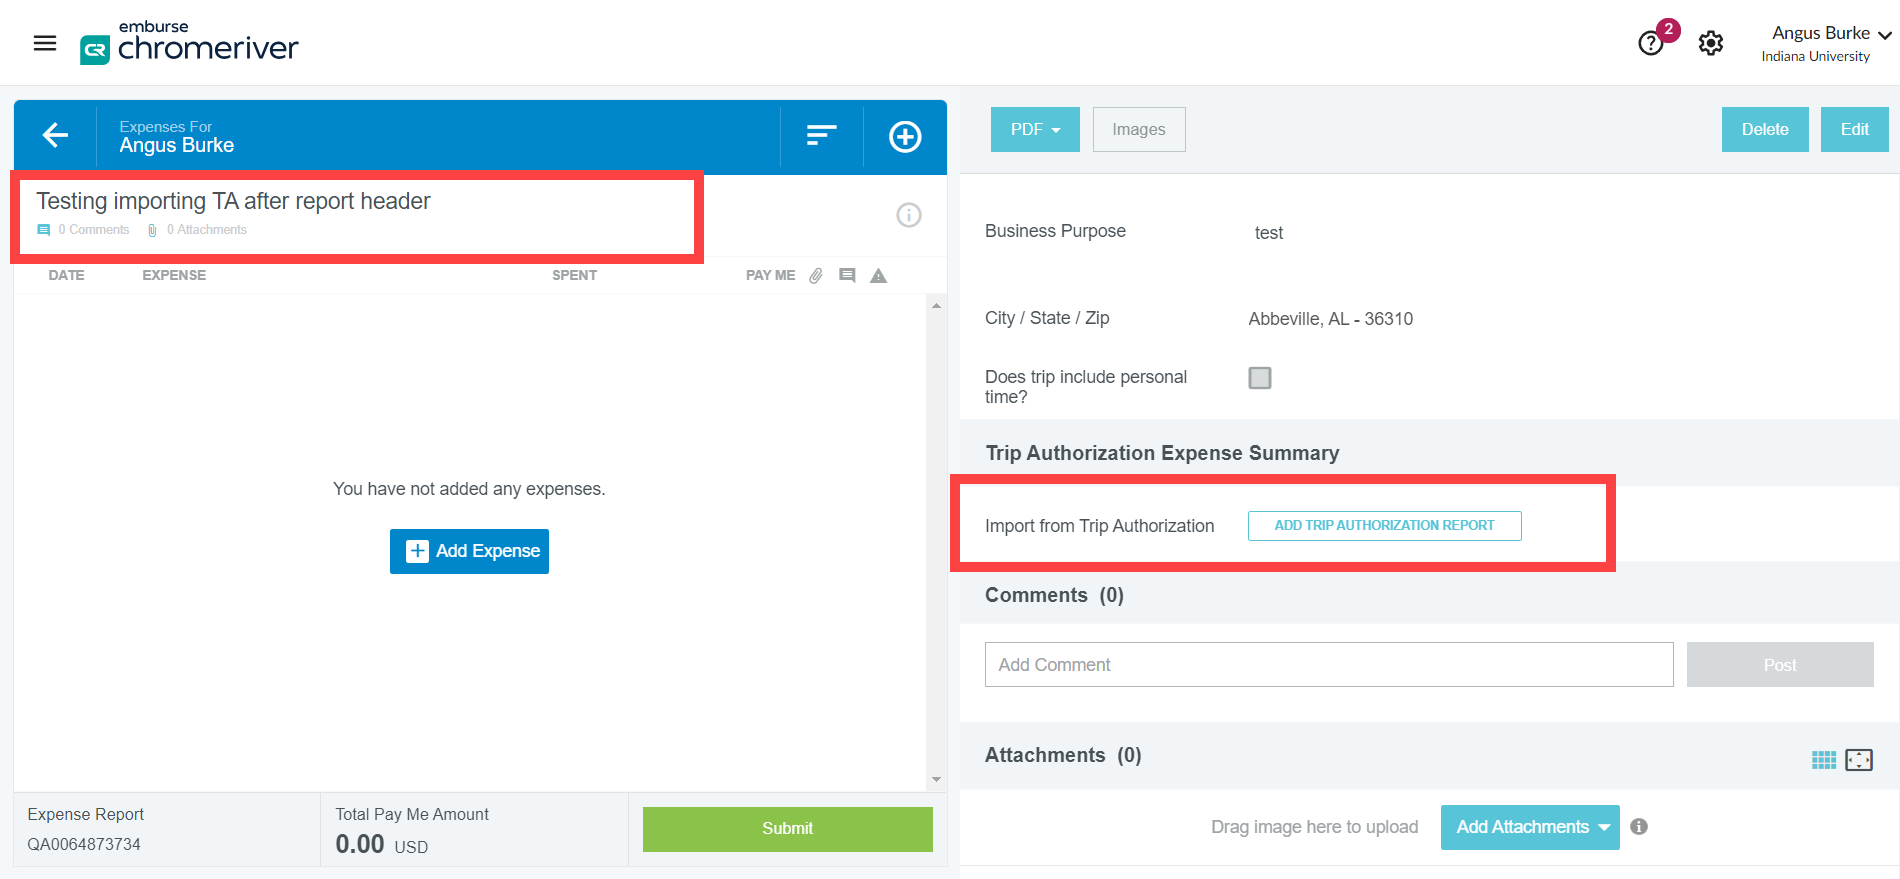
Before adding any expense tiles manually, click to make the expense tile panel disappear. Scroll down and you’ll see the "Add Trip Authorization Report" button on the right-hand panel:
Once you click “Add Trip Authorization Report,” and choose the appropriate report, you’ll uncheck the checkbox:
What will be imported from the trip authorization:
- Nothing
This is a good option if:
- Trip dates are different from dates on trip authorization.
- You’ve combined all estimated expenses without a dedicated expense tile in the trip authorization report on one Other Misc expense tile, i.e., the sum of both estimated parking and estimated taxi expenses are included on one Other Misc expense line and will need to be separated on the expense report.
- You prefer to enter details of line items from scratch instead editing details like actual amounts and purchase dates.
Option 3
The third option to import your trip authorization into your expense report will appear immediately after you click the first Submit button and before you confirm submission. A "Submit Confirmation" message will appear:
Clicking Submit without having attached a trip authorization for a domestic report or international report will also prompt you to add a trip authorization.
Click “Trip Authorization” and import the appropriate report as you normally would.
What will be imported from the trip authorization:
- Nothing
This is a good option if:
- You like to start with a clean slate and add your expenses manually.
- Your trip authorization contained the incorrect dates or report type by mistake.
Option 4
The fourth option to import your trip authorization into your expense report requires 2 import spots, but sometimes might be helpful, depending on your need. If you want header fields imported from a trip authorization, but to enter expenses from scratch, this is a good option.
Initially you will want to select to import a trip authorization.
Select your trip authorization and then select import.
What will be imported from the trip authorization initially:
- Header details of report
This is a good option if:
- The report type and travel type are correct.
- You want header level details entered from the trip authorization.
The next step of this import option is to edit details on header level, if needed, and add in any required fields that may be needed. Once completed, select to unapply the trip authorization towards the bottom of the page.
What will import now:
- Nothing
This is a good option if:
- You want to enter report expenses form scratch instead of editing them.
Once into the report, you can reattach the expense report as done in option 2B or option 3.
Definitions
- Trip Authorization:
- Report type generated to estimate trip expenses to gain authorization for travel, domestically and/or internationally
Change Log
| Date | Change description | Completed by |
|---|---|---|
| 10/08/2025 | Add companion guide to clarify process. | Juliet Roberts |


